Get Started with MicroPython & Mu
Microbit V1 only. V2 is not supported at this time.
This tutorial is for anyone looking to try text-based coding.
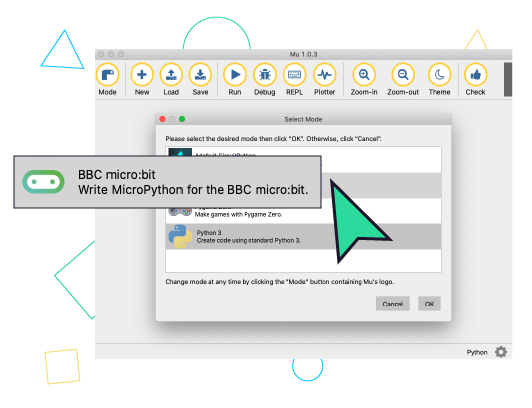
The Mu Editor has a known bug with macOS Catalina and higher and doesn’t function at this time. If you’re on a Mac please try the online Python editor.
If you’re new to GiggleBot and/or coding we suggest starting with MakeCode.
![Check out the GiggleBot readthedocs for micropython](https://gigglebot.io/wp-content/uploads/2020/11/read-the-docs.png)
Find installation instructions, drivers, and everything you need to start programming the GiggleBot in Python.
01 Download Mu
![Mu compatibility – Windows - MacOS](https://gigglebot.io/wp-content/uploads/2020/11/mu-compat.png)
02 Download Driver File
03 Place Driver File
![Save your driver file in the folder that corresponds with your operating system.](https://gigglebot.io/wp-content/uploads/2020/11/driver-location.png)
01: Place the Driver File "gigglebot.py" in the Mu application folder on your local drive.
For Windows:
Place file in: c:/users/<USERNAME>
Where <USERNAME> is your username on your local computer.
For macOS:
Place file in: /users/<USERNAME>/mu_code
Where <USERNAME> is your username on your Mac.
04 Open Mu
![Open the Mu Editor and select the micro:bit mode.](https://gigglebot.io/wp-content/uploads/2020/11/open-mu-editor.png)
01: Open the Mu Editor
02: Click "Mode." Then, select "micro:bit"
05 Flash an empty file
![Click the Flash button at the top of the editor to flash a blank file. Make sure your micro:bit is connected to your computer.](https://gigglebot.io/wp-content/uploads/2020/11/flash-empty-1.png)
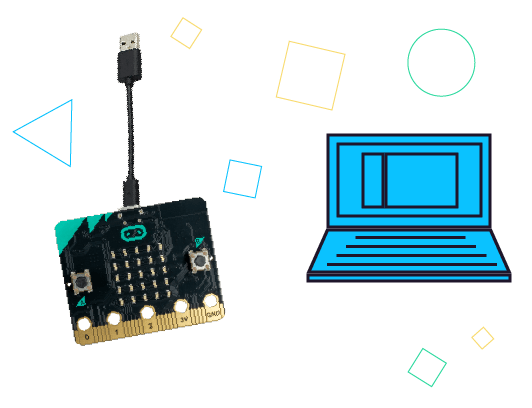
01: Connect the micro:bit to your computer using the Micro-USB cable.
02: Click "New" to create a new file.
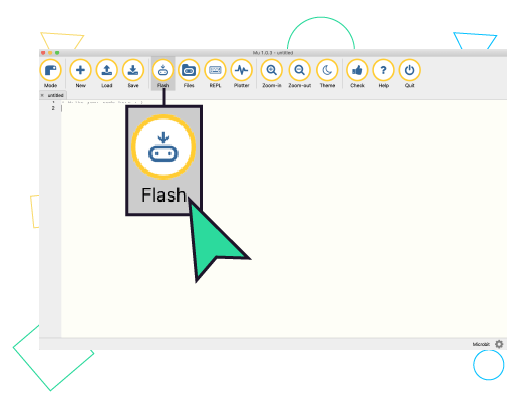
03: Flash the empty file using the "Flash" icon at the top of the editor.
06 Reset your micro:bit
![](https://gigglebot.io/wp-content/uploads/2020/11/reset-microbit.png)
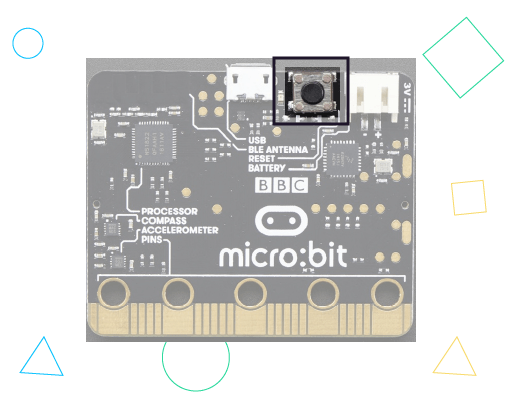
01: Reset your micro:bit by pressing and holding the reset button. This button is located on the back of the micro:bit near the Micro-USB charging port.
07 Transfer the library
![Click the Files button at the top of the Mu Editor window.](https://gigglebot.io/wp-content/uploads/2020/11/files-button.png)
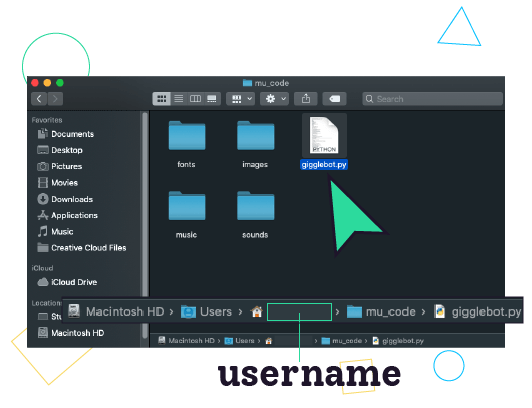
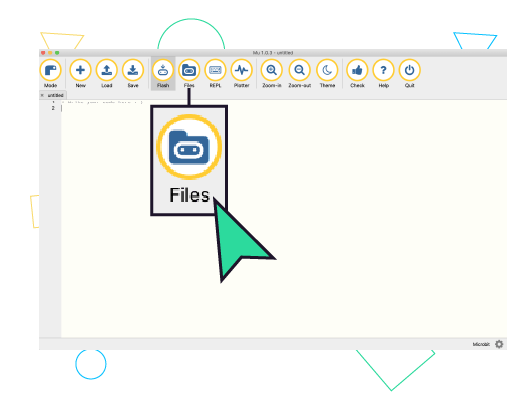
01: Click "Files" in the top bar.
![Drag "gigglebot.py" from my computer to my micro:bit.](https://gigglebot.io/wp-content/uploads/2020/11/drag-driver-file.png)
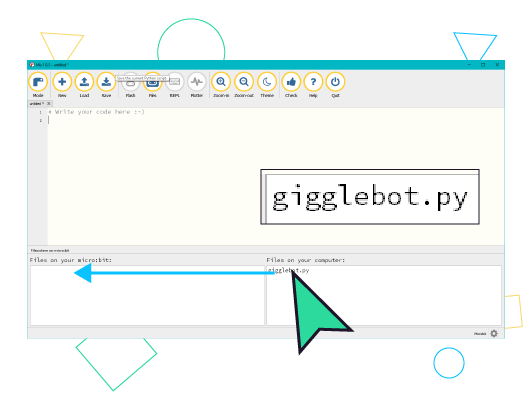
02: Drag the gigglebot.py file over from the right-hand side, under "Files on your computer" to "Files on your micro:bit"
03: After the file has transferred to the micro:bit, click "Files" again to close the pane.
08 Test
![Connect your micro:bit to your computer using the micro-USB cable.](https://gigglebot.io/wp-content/uploads/2020/11/16-connect-via-usb.png)
01: To test, make sure your micro:bit is connected to your computer.
![Sample python program - see text below.](https://gigglebot.io/wp-content/uploads/2020/11/sample-python-gigglebot-py.png)
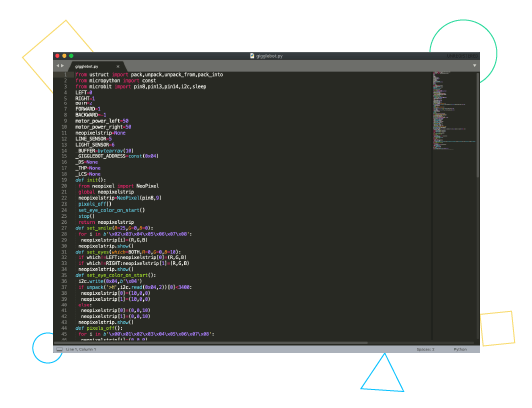
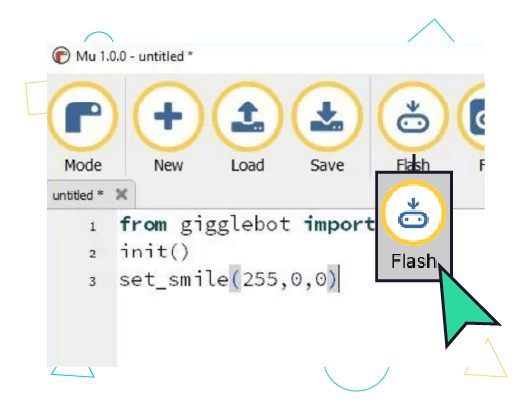
02: Copy the following code and paste it into the Mu Editor.
from gigglebot import *
init()
set_smile(255,0,0)
03: Click "Flash" to transfer the program.
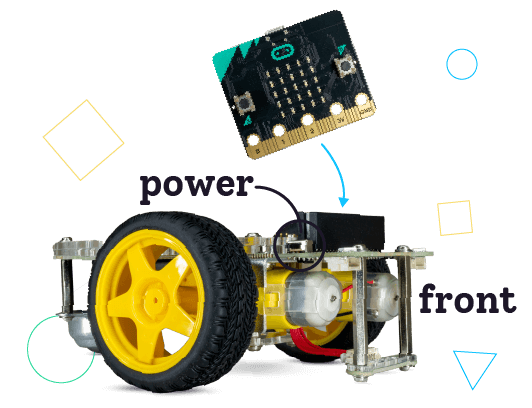
08 GiggleBot test
![Connect micro:bit to the GiggleBot - buttons face front of robot.](https://gigglebot.io/wp-content/uploads/2020/11/20-connect-microbitgigglebot2.png)